To share your survey, you'll want to navigate to the 'Share' tab. There, you will find several ways to share out your survey.
Create Email Invitations
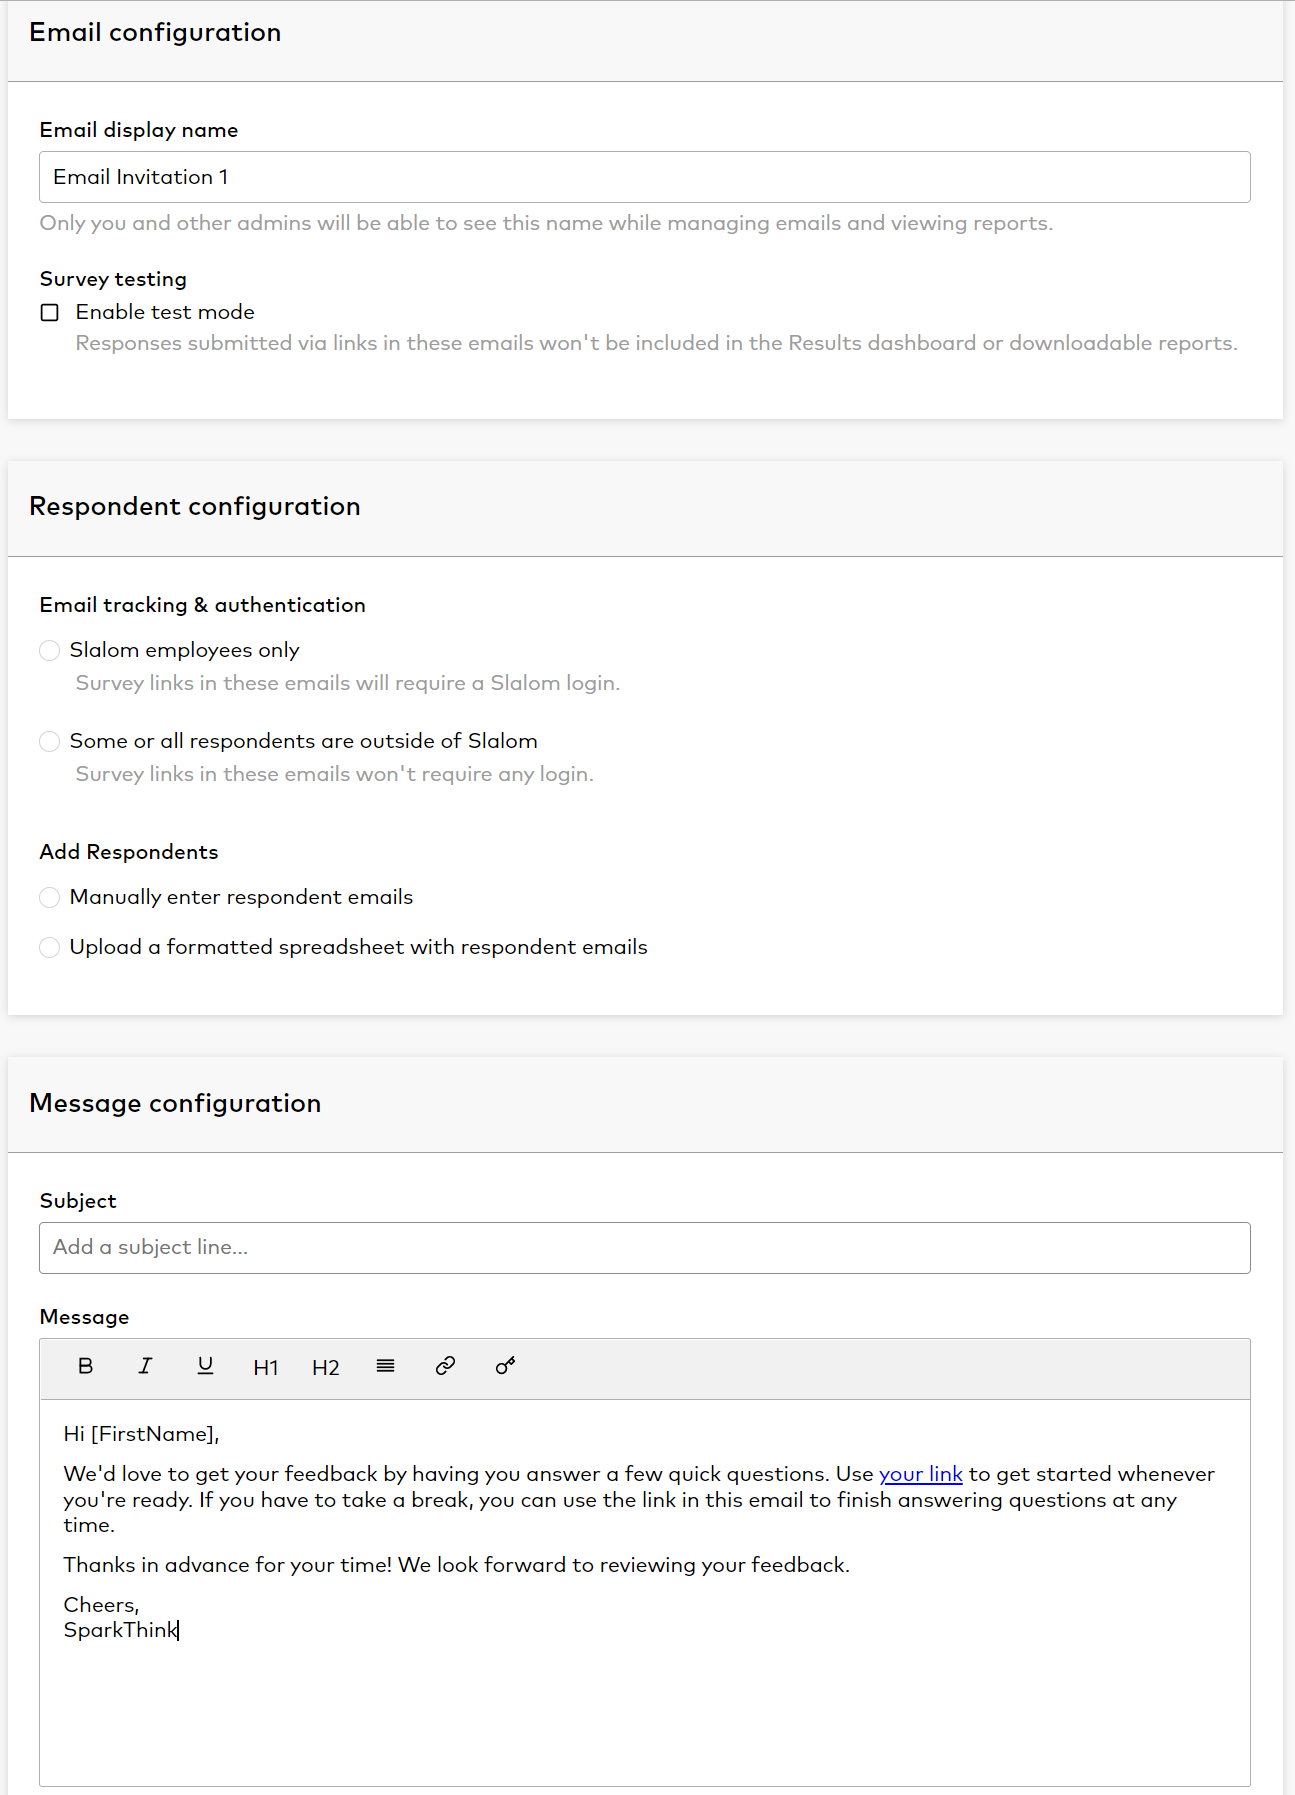
Step 1: Email configuration
Email display name: You can label your collector anything you want - this will only be visible to you and any other admins on your project
Enable test mode: Select this box if you would like this collector to be a test. This means whoever you send the link to will be able to take the survey but their results will not be counted. This cannot be changed once you've sent it out - so if you accidentally send it to your participant list, none of their results will count. This is for testing your project ONLY.
Step 2: Respondent configuration
Email tracking & authentication
Slalom employees only: Participants will be required to sign in with their Slalom credentials before taking the survey
Some or all of the respondents are outside of Slalom: Participants will not be required to login so they can be outside of our organization. This will be a personal URL for them to take the survey and will be associated with their name. Use this option if you have participants that are both Slalom and external.
Add respondents
Two options:
1. Manually enter each email address (make sure to press enter after - the email will turn blue)
2. upload an excel spreadsheet.
Step 3: Message configuration
This is where you will craft what your email will say. You can highlight any word in the body of the message to make the link for the survey - just highlight the word and press the key icon. We also have the ability to use different attributes and pull them through in the email. For example: Let's say we want to include the location of each participant in your email body. You would upload an attribute with your excel sheet (refer to Step 2). The attribute would be called Location and each participant would have something in that cell. To use the attributes in the body of the email you just take the attribute name and put brackets around it, [Location]. It would look something like this.
Hi [FirstName],
We want to know what your experience in [Location] has been over the past 3 months. Please help us out by answering a few questions.
When the participant receives their invite, it will be custom to their specific attributes you uploaded and will look like this.
Hi Jane,
We want to know what your experience in Seattle has been over the past 3 months. Please help us out by answering a few questions.

When you're ready, select 'review email' to preview your email before sending it.
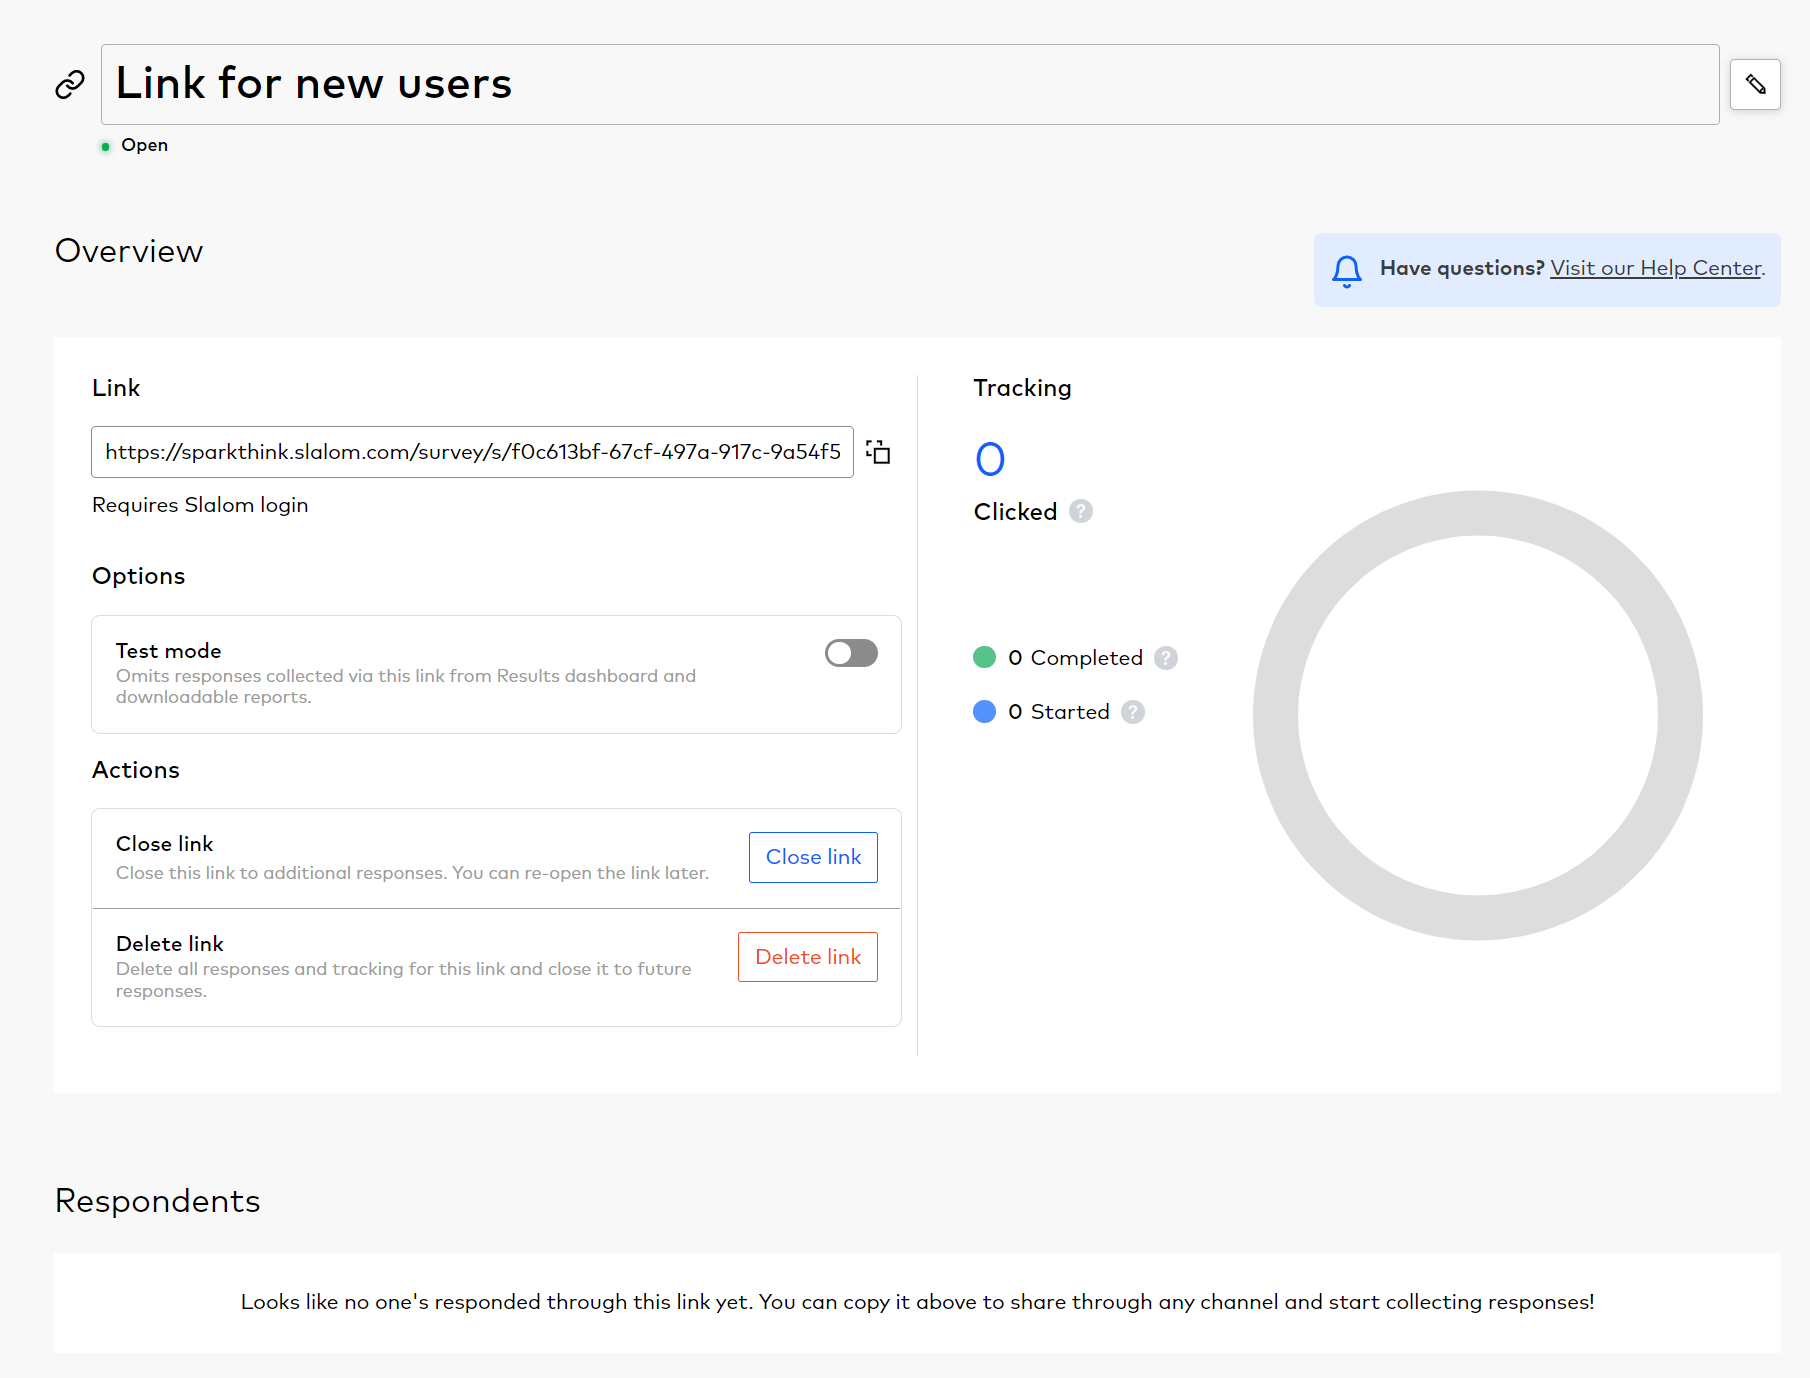
Create Survey Link Invites

Link Configuration
Link display name: Name your collector by typing into this box. Ex: Wave 1, January invites, Stakeholders and Execs, etc.
Survey testing: Select this box if you would like this collector to be a test. This means whoever you send the link to will be able to take the survey but their results will not be counted. This cannot be changed once you've sent it out - so if you accidentally send it to your participant list, none of their results will count. This is for testing your project ONLY.
Access Configuration
Anonymous: This option is for Slalom employees and/or non-Slalom employees. Participants will not be asked to sign in before taking the survey. Participants will be anonymous in your results.
Slalom: This option is for Slalom-only participants. When they click on the link, participants will be required to sign in using their Slalom credentials before proceeding to the survey.

Once you select 'Create', a link will be generated for you to send off or post.

Managing Email and Link Invites
When you generate an email or link invite, it will show up on your share page.
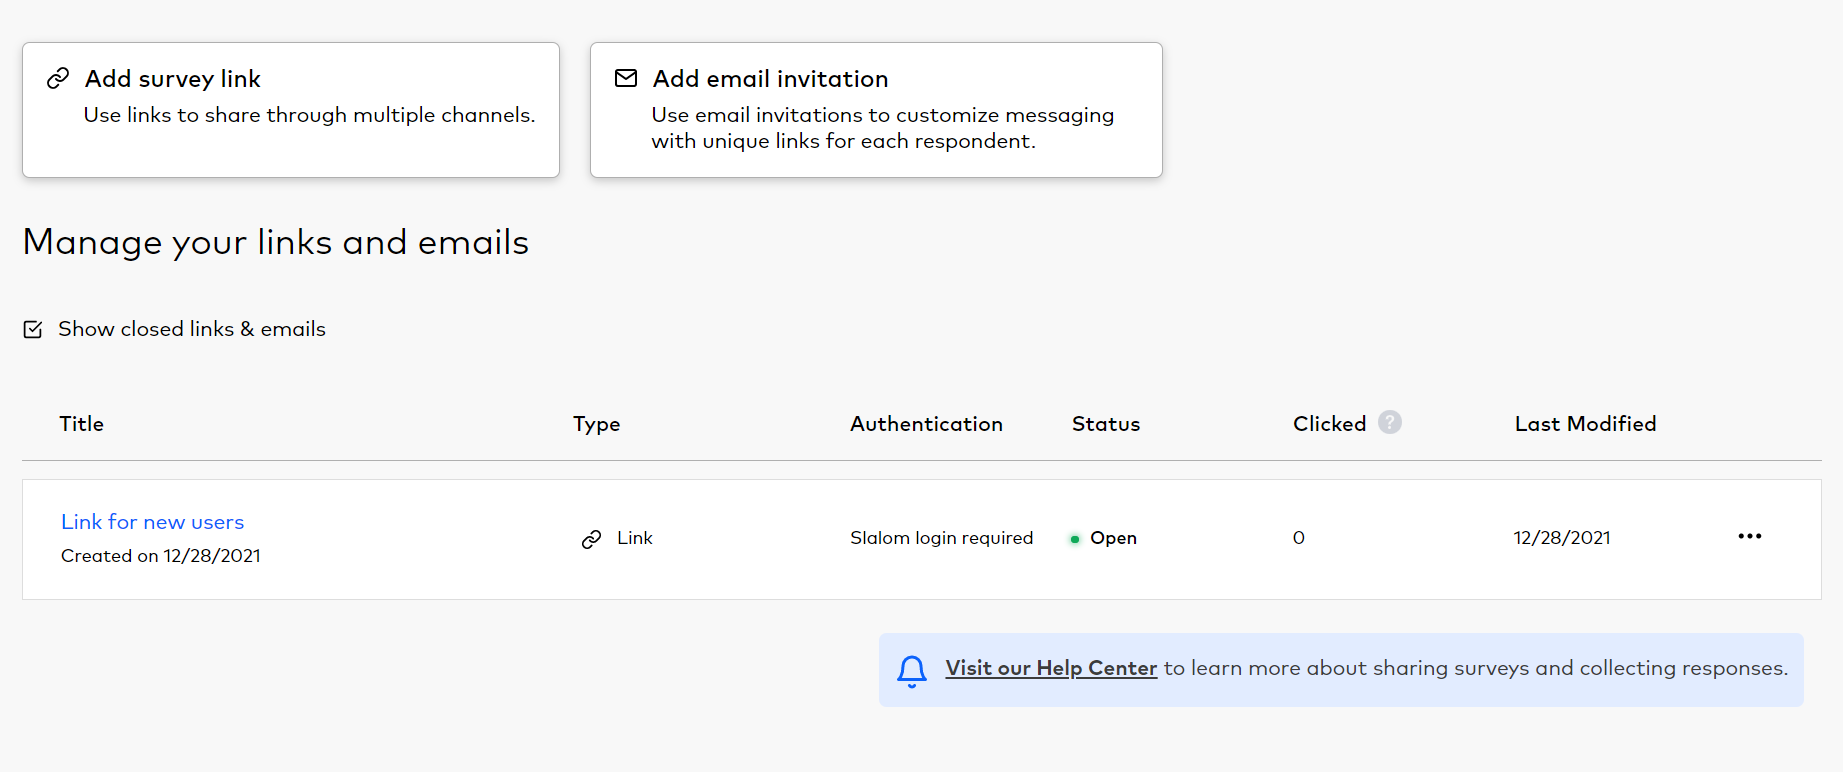
To see more details about your invites, click the collector to see the details page.